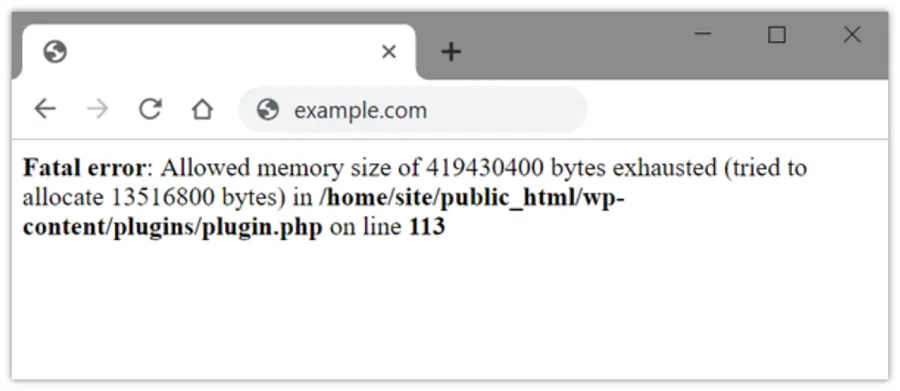
The ‘Fatal error: Allowed Memory Size exhausted’ is a commonly encountered error in WordPress. This error can be frustrating because it hinders your ability to access your website and perform essential tasks. You can easily resolve it by increasing the PHP memory limit within WordPress.
When you encounter a white screen of death on WordPress sites, it typically indicates that a script on your website has exceeded the memory limit. If you want to understand what the White Screen of Death is in WordPress and how to fix it, I recommend reading the blog below in its entirety for a detailed explanation and instructions on resolving the white screen issue.
Blog – White Screen of Death in WordPress
In this article, we will know in detail what causes the “Memory size exhausted” error and explore how to increase your PHP memory limit to resolve it. So, continue reading to learn more.
What Is the WordPress Memory Exhausted Error?
WordPress is written in PHP, which is a server-side programming language.
WordPress Memory Limit Errors is a type of error it occurred when a WordPress site exceeds the allocated memory limit set by the server. When your site exceeds this limit, PHP generates an error and stops the process, which results in an error message such as “Fatal error: Allowed memory size exhausted” or similar variations. When these errors occur, certain functionalities may be affected or rendered inaccessible.


It is most likely to occur when you perform certain actions on your site
- Use New Theme or Plugin – Poorly coded or outdated plugins/themes may also contribute to memory exhaustion issues.
- Upload a Large Images file.- Large images can consume a significant amount of memory, especially when they are not optimized for the web
- High Traffic- Sometimes, when the traffic to a website suddenly increases, it can lead to high memory usage, which may be one of the causes of a fatal error.
Methods to Fix WordPress Memory Limit Error


We will explore two methods to attempt to fix the WordPress Memory Limit Error.
- Editing the wp-config.php file and increasing wp_memory_limit
- Editing the .htaccess file and increasing wp_memory_limit.
Editing the wp-config.php file
This is the easiest way to fix this error is by increasing the PHP memory limit. Simply add the following code to your wp-config.php file.
You need to follow Step to step process to increase the memory limit
- Access your WordPress site’s files via FTP or a file manager provided by your hosting service.
- Open the public_html folder and locate your wp-config.php file
- Download a backup copy of the “wp-config.php” file for safety.
- Open the “wp-config.php” file in a text editor.
- paste the following line of code.


- Replace ‘256M’ with the desired memory limit (e.g., ‘512M’ for 512 megabytes).
- Save the changes to the “wp-config.php” file.
- Upload the modified “wp-config.php” file back to your server, replacing the existing one.
Refresh your WordPress site and check if the memory limit has increased.
Editing the .htaccess file.
The .htaccess file is a file located at the root of your WordPress files. You can access the root directory using a file manager provided by your hosting provider.
Now you need to follow some steps to increase to memory limit
- Open the public_html folder and locate your .htaccess file
- First, need to Download a backup copy of the “.htaccess ” file for safety.
- Open the .htaccess folder in a text editor.
- Add the following code at the bottom of the .htaccess file.


- Replace ‘256M’ with the desired memory limit (e.g., ‘512M’ for 512 megabytes).
- Save the changes to the “.htaccess ” file.
- Upload the modified “.htaccess” file back to your server, replacing the existing one.
Test your website: Access your WordPress site and check if the memory limit error has been resolved.
Note: If the methods mentioned above do not work for you or you prefer not to make these changes yourself, I recommend consulting your hosting provider. They can assist you in increasing the memory limit from their end, ensuring that your website operates smoothly.


